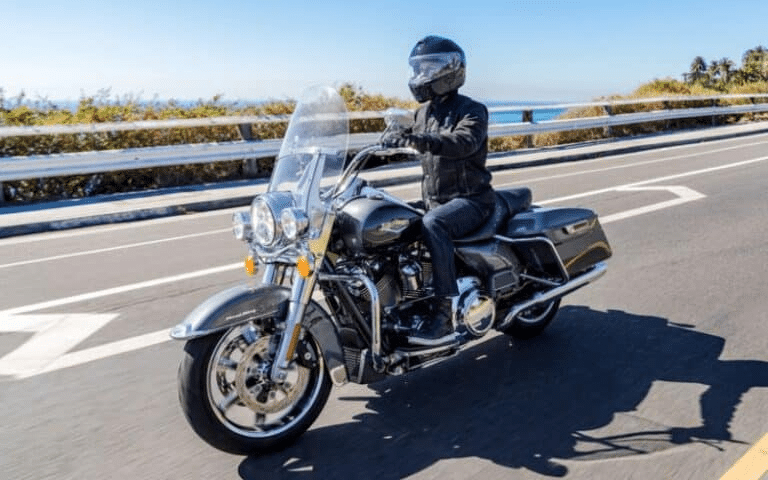
The Harley-Davidson Road King is a classic touring motorcycle that combines style, performance, and comfort.
However, like any other vehicle, it can also experience problems that may affect its functionality and safety.
This article will provide solutions to the some common issues that Road King owners face.
Table of Contents
1. Harley Road King Won’t Start
There are many possible reasons why your Harley-Davidson Road King may fail to start, such as a dead battery, a bad connection, a faulty ignition switch, a clogged fuel filter, or a defective starter. This section will help you identify and fix some of the common causes of Road Kings that won’t start.
Check the Battery
The battery is the most likely culprit when your Road King won’t start. A weak or dead battery can prevent the motorcycle from getting enough power to crank the engine.
- To check the battery, you’ll need a voltmeter or a multimeter.
- Connect the positive (+) lead of the voltmeter to the positive (+) terminal of the battery and the negative (-) lead to the negative (-) terminal.
- The battery voltage should be around 12.6 volts when fully charged. If the voltage is lower than 12 volts, the battery is weak and needs to be recharged or replaced.
Secure the Battery Connections
Loose or corroded battery terminals or cables can cause no-start problems by interrupting the flow of electricity from the battery to the starter and other components.
- Remove the seat and the battery cover. Inspect the battery cables and terminals for any corrosion, damage, or looseness.
- If you see any corrosion, clean it with a wire brush or a baking soda solution.
- If you see any damage, replace the cable or the terminal.
- If you see any looseness, tighten the bolts or nuts with a wrench.
Check the Ignition Switch
The ignition switch allows you to turn on and off the motorcycle. If the ignition switch is faulty, it can prevent the bike from starting.
- Inspect your Road King’s ignition switch with a test light or a multimeter.
- Connect the test light or the multimeter to the battery and probe the wires that go to the ignition switch.
- Turn the ignition switch to the ON position and see if the test light or the multimeter shows any power.
- If there is no power, the ignition switch is wrong and needs to be replaced.
Inspect the Fuel Filter
The fuel filter filters out any dirt or debris from the fuel before it reaches the engine. If the fuel filter is clogged, it can restrict fuel flow to the engine and cause a no-start problem.
- To check your Road King’s fuel filter, locate it under the fuel tank.
- Disconnect the fuel line from the filter and blow air through it.
- If you feel any resistance, the fuel filter is clogged and needs to be replaced.
Check the Starter
The starter spins the engine when you press the start button. If the starter is defective, it can fail to spin the motor and cause a no-start problem.
- To check the starter, locate it under the oil tank.
- Disconnect the battery cable from the starter and connect a jumper cable from the battery to the starter terminal.
- Press the start button and see if the starter spins. If the starter won’t turn, the starter is bad and needs to be replaced.
2. Harley Road King Throttle Not Working
One of the most common problems with your Harley Road King is when the throttle fails to respond to your input. This means the motorcycle does not accelerate or decelerate as you twist the throttle, as the Road King has no response.
Check the Throttle by Wire System
The throttle-by-wire system is a design that eliminates the throttle cable and uses an electronic sensor, a throttle body, and an engine computer to control the throttle.
If any of these components are defective or have a bad connection, the throttle-by-wire system can fail and cause a no-throttle response problem.
- To check the throttle by wire system, use a multimeter.
- Check for diagnostic codes.
- Reset your ECM.
- Check the wiring between the fuel tank and the fairing.
- Inspect the throttle twist grip sensor.
- Check the throttle control actuator (TCA).
Check the Throttle Cable
If your Harley Road King has a throttle cable instead of a throttle-by-wire system, inspect the throttle cable for any damage or pinching that may prevent the throttle from working correctly.
- To check the throttle cable, locate it under the tank and follow it to the throttle body.
- Inspect the cable for wear, fraying, kinking, or stretching. If you see any damage, replace the cable.
- check the cable for any pinching or binding that may restrict its movement.
- If you see any pinching, loosen the cable and reroute it to avoid interference.
Check the Ignition Switch
The ignition switch is the component that allows you to turn on and off the motorcycle. A faulty ignition switch can prevent the bike from starting or responding to the throttle.
- Inspect the ignition switch with a test light or a multimeter.
- Connect the test light or the multimeter to the battery and probe the wires that go to the ignition switch.
- Turn the ignition switch to the ON position and see if the test light or the multimeter shows any power.
- If there is no power, the ignition switch is bad and needs to be replaced.
Check the Throttle Plate
The throttle plate regulates the amount of air that enters the engine. If the throttle plate is stuck or dirty, it can prevent the throttle from working correctly.
- To check the throttle plate, remove the air cleaner cover and inspect the throttle body.
- See if the throttle plate moves freely when the engine is not running. If not, clean the throttle body with some carburetor cleaner and a soft brush.
- If the throttle plate still doesn’t move, you need to replace the throttle body.
3. Harley Road King Keeps Cutting Out
Harley Road King owners may experience sudden power loss, stalling, sputtering, or backfires. Causes might include faulty ignition switches, bad crank sensors, clogged fuel filters, dirty throttle bodies, or wiring issues.
Check the Ignition Switch
A worn or damaged ignition switch can cause the motorcycle to cut out randomly or not start at all. Inspect the Ignition Switch using the directions above.
Inspect the Crank Sensor
The crank sensor detects the position and speed of the crankshaft and sends a signal to the engine computer. A faulty crank sensor can cause the motorcycle to cut out or misfire.
- you’ll need a multimeter and a T-pin to check the crank sensor.
- Locate the crank sensor behind the oil filter and disconnect the connector.
- Probe the sensor wires with a T-pin and a multimeter.
- The sensor should have a resistance of 0.8 to 1.6 kilo-ohms. If the resistance is out of range, replace the sensor.
Check the Fuel Filter
If the fuel filter is clogged, it can restrict the fuel flow, causing the motorcycle to cut out or run lean. Check the Fuel Filter using the instructions mentioned earlier in the guide.
Check the Throttle Body
The throttle body regulates the amount of air that enters the engine. If the throttle body is dirty or has a faulty idle air control (IAC) valve, it can cause the motorcycle to cut out or idle poorly.
- To check the throttle body, remove the air cleaner cover and inspect the throttle body.
- See if the throttle plate moves freely when the engine is not running. If not, clean the throttle body with some carburetor cleaner and a soft brush.
- Also, check the IAC valve, which is located on the side of the throttle body. The IAC valve controls the idle speed by adjusting the amount of air that bypasses the throttle plate.
- If the IAC valve is dirty or stuck, it can cause the motorcycle to cut out or idle erratically.
- To inspect the IAC valve, remove it from the throttle body and inspect the pintle, which is the metal rod that extends and retracts from the valve.
- The pintle should be clean and smooth. Clean it with some carburetor cleaner and a soft cloth if it is dirty or corroded. If damaged or worn, replace the IAC valve.
Check the Wiring
Inspect the wiring harnesses and connectors for any signs of damage or looseness.
Pay special attention to the wiring that goes to the ignition switch, the crank sensor, the fuel injector, and the throttle-by-wire system.
Related: 6 Common Harley Davidson Road King Problems (Explained)
4. Harley Road King Battery Not Charging
If your HD Road King’s battery loses power faster than the charging system replenishes, it can result in a dead battery and a stranded motorcycle.
Check the Battery
If the battery is old, weak, or damaged, it can prevent the motorcycle from starting or running correctly. Use the instructions above to check the battery with a voltmeter or a multimeter.
Check the Stator
The stator is the part responsible for charging the battery while you ride. It’s located inside your Road King’s primary case. A faulty stator can fail to produce enough power to recharge the battery.
- Check the stator with a multimeter and a T-pin.
- Locate the stator connector behind the oil filter and disconnect it.
- Probe the wires of the stator with a T-pin and a multimeter.
- The stator should have a resistance of 0.1 to 0.2 ohms and an output voltage of 19 to 26 volts AC at 2000 RPM.
- If the resistance or the voltage is out of range, replace the stator.
Check the Voltage Regulator
The voltage regulator regulates your Road King’s electrical energy that charges the battery. It’s located behind the rear tire and is attached to the frame. If the voltage regulator is defective, it can overcharge or undercharge the battery.
- you will need a multimeter and a T-pin to check the voltage regulator. Locate the voltage regulator connector and disconnect it.
- Probe the wires of the voltage regulator with a T-pin and a multimeter.
- The voltage regulator should have a 14 to 15-volt DC voltage at the battery terminals at 2000 RPM.
- Replace the voltage regulator if the voltage is not as expected.
5. Harley Road King Throttle Sticking
A sticking throttle is dangerous, as your Road King may continue to accelerate even after you release the bike’s throttle. If you experience your throttle sticking, hit the kill switch and pull over immediately.
Check the Throttle-by-Wire System
If your Road King’s throttle body and an engine computer to control the throttle are defective or have a bad connection, the throttle-by-wire system can fail and cause the throttle to stick.
Follow the instructions in the article for a thorough throttle system inspection.
Check the Throttle Cable
If your Harley Road King has a throttle cable instead of a throttle-by-wire system, check the cable for any damage or pinching that may prevent the throttle from returning to idle properly.
We explained this process in detail in previous sections.
6. Harley Road King Keeps Stalling
If your Road King stalls, suddenly loses power and stops running, won’t turn over, or hesitates and surges, you may have a bad ignition switch, a faulty crank sensor, a clogged fuel filter, a dirty throttle body, or a loose wire.
Inspect the Ignition Switch
If your Road King’s ignition switch is faulty, it can cause the motorcycle to stall randomly or not turn over. Following the earlier instructions, test the ignition switch with a test light or a multimeter.
Check the Crank Sensor
The crank sensor detects the position and speed of the crankshaft and sends a signal to the Road King’s ECU. The motorcycle can stall, surge, or misfire if the crank sensor is faulty. Check the crank sensor with a multimeter and a T-pin.
Check the Fuel Filter
If your Road King’s fuel filter is clogged, it can restrict fuel flow to the engine and cause the bike to stall. Locate the fuel filter under your King’s fuel tank, disconnect the fuel line from the fuel filter, and blow air through it to text for resistance.
7. Harley Road King Fork Leaking
One of the most common problems you may face with your Harley Road King, especially if routine upkeep is lax, is when the fork leaks oil from the seals or the caps. This causes the fork to lose its damping ability, affecting the motorcycle’s handling and comfort.
Check the Fork Seals
The fork seals prevent the oil from escaping from the fork tubes. If the fork seals are worn or damaged, the oil can leak out and contaminate the brake pads and the tire.
- Check the fork seals by removing the chrome cover and the dust shield from the fork.
- Inspect the seals for signs of cracking, tearing, or swelling.
- If you see any damage, replace the seals with new ones.
Check the Fork Caps
The fork caps seal the top of the fork tubes. If the fork caps are loose or cracked, they can cause the oil to leak out and reduce the air pressure in the fork.
- Remove the windshield from the front of the bike.
- Inspect the caps for any signs of damage or looseness.
- Replace damaged caps with new ones.
- Tighten loose caps with a wrench.
Check the Fork Tubes
If the fork tubes are bent or scratched, they can damage the seals and cause the oil to leak out.
- Remove the forks from the clamps.
- Inspect them for any signs of deformation or abrasion.
- Replace as needed.
8. Harley Road King Glide Death Wobble
A Death or Speed Wobble is a rare but dangerous problem where the bike starts to shake violently and uncontrollably at high speeds, making it difficult to steer or brake.
Check the Swingarm
The swingarm connects the rear wheel to the frame, allowing it to move up and down. If loose or worn, the rear wheel wobbles, affecting the motorcycle’s stability.
- To check the swingarm, lift the rear wheel off the ground and inspect the swingarm bearings and bushings for any signs of damage or play.
- If you see any damage, replace the bearings and bushings.
- tighten the swingarm pivot shaft with a wrench if you see any play.
Check Tire Pressure
If the tire pressure is low or uneven, it can cause the tires to deform and affect your Road King’s handling and braking.
Balance the Wheels
The wheel balance is the distribution of weight on the wheel. If the wheel balance is off, it can cause the wheel to vibrate and wobble at high speeds.
9. Harley Road King Glide Rough Idle
A rough idle is a condition where the engine runs unevenly or erratically and can cause a dip in performance or acceleration.
Check the Throttle Body
If the throttle body is dirty or has a faulty idle air control (IAC) valve, it can cause the engine to idle poorly or stall.
Inspect Ignition Switch
If your Road King’s ignition switch is faulty, it can cause the engine to run and idle rough.
Unclog Fuel Filter
A clogged fuel filter restricts fuel flow and causes a rough idle.